

Stop Losing Money: Top Insulation Solutions for Crawl Space Ducts

Gregg Kell VACRS

Why Insulating Ductwork in Crawl Space is Costing You Money
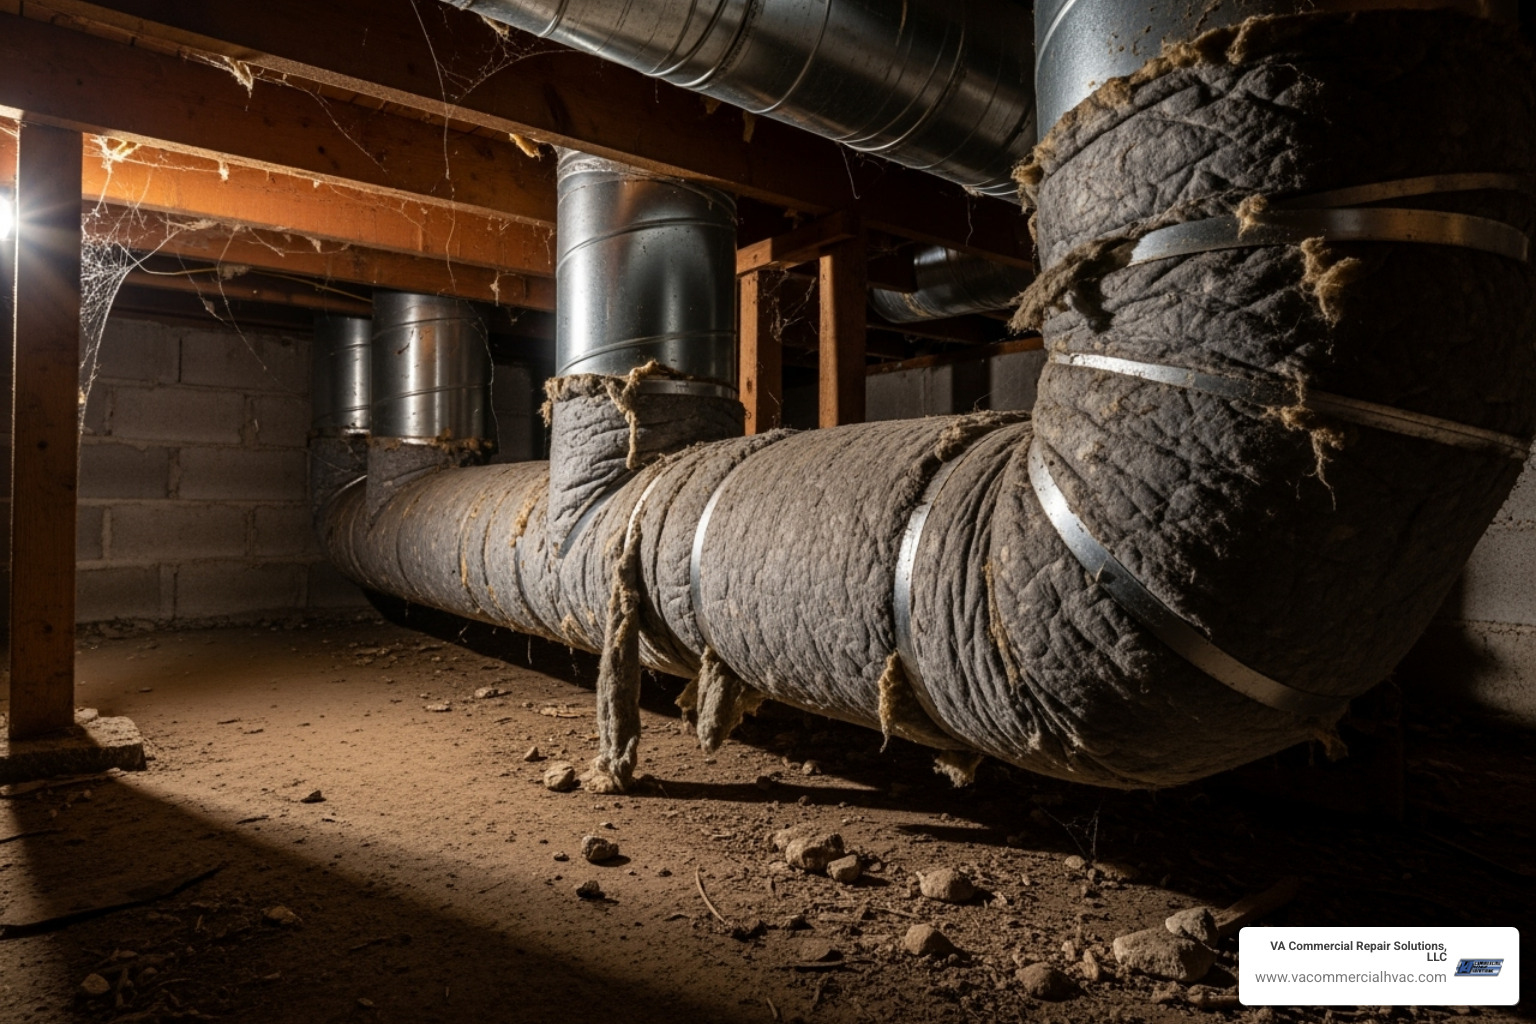
insulating ductwork in crawl space - insulating ductwork in crawl space

Insulating ductwork in crawl space is essential for preventing energy loss and reducing operating costs. Here's what you need to know:

Top Insulation Solutions:

  • Fiberglass Duct Wrap - Most cost-effective, R-6 to R-8 rating
  • Rigid Foam Board - Higher R-value per inch, moisture resistant
  • Spray Foam - Best air sealing, professional application recommended

Key Steps:

  1. Seal air leaks first with mastic sealant
  2. Choose proper R-value (R-8 for unconditioned spaces)
  3. Wrap ducts completely without compressing insulation
  4. Secure with UL 181 foil tape

If you're running a restaurant or facility in Central Virginia, uninsulated crawl space ducts are silently draining your budget. The Department of Energy reports that uninsulated ducts can lose more than 30% of their heating or cooling capacity - that's money flowing straight out of your building every month.

You've probably noticed the signs: rooms that never reach the right temperature, sky-high energy bills, or that musty smell that won't go away. Close to 25% of the energy you use to heat and cool your facility disappears through leaky ductwork in unconditioned spaces like crawl spaces.

The good news? This is one of the most cost-effective improvements you can make to your building's efficiency.

I'm Gregg Kell from VA Commercial Repair Solutions, and I've helped countless facility managers in Central Virginia solve their insulating ductwork in crawl space challenges over the years. From restaurants losing money on cooling costs to offices with uncomfortable dining areas, proper duct insulation typically pays for itself within the first year through reduced energy bills.
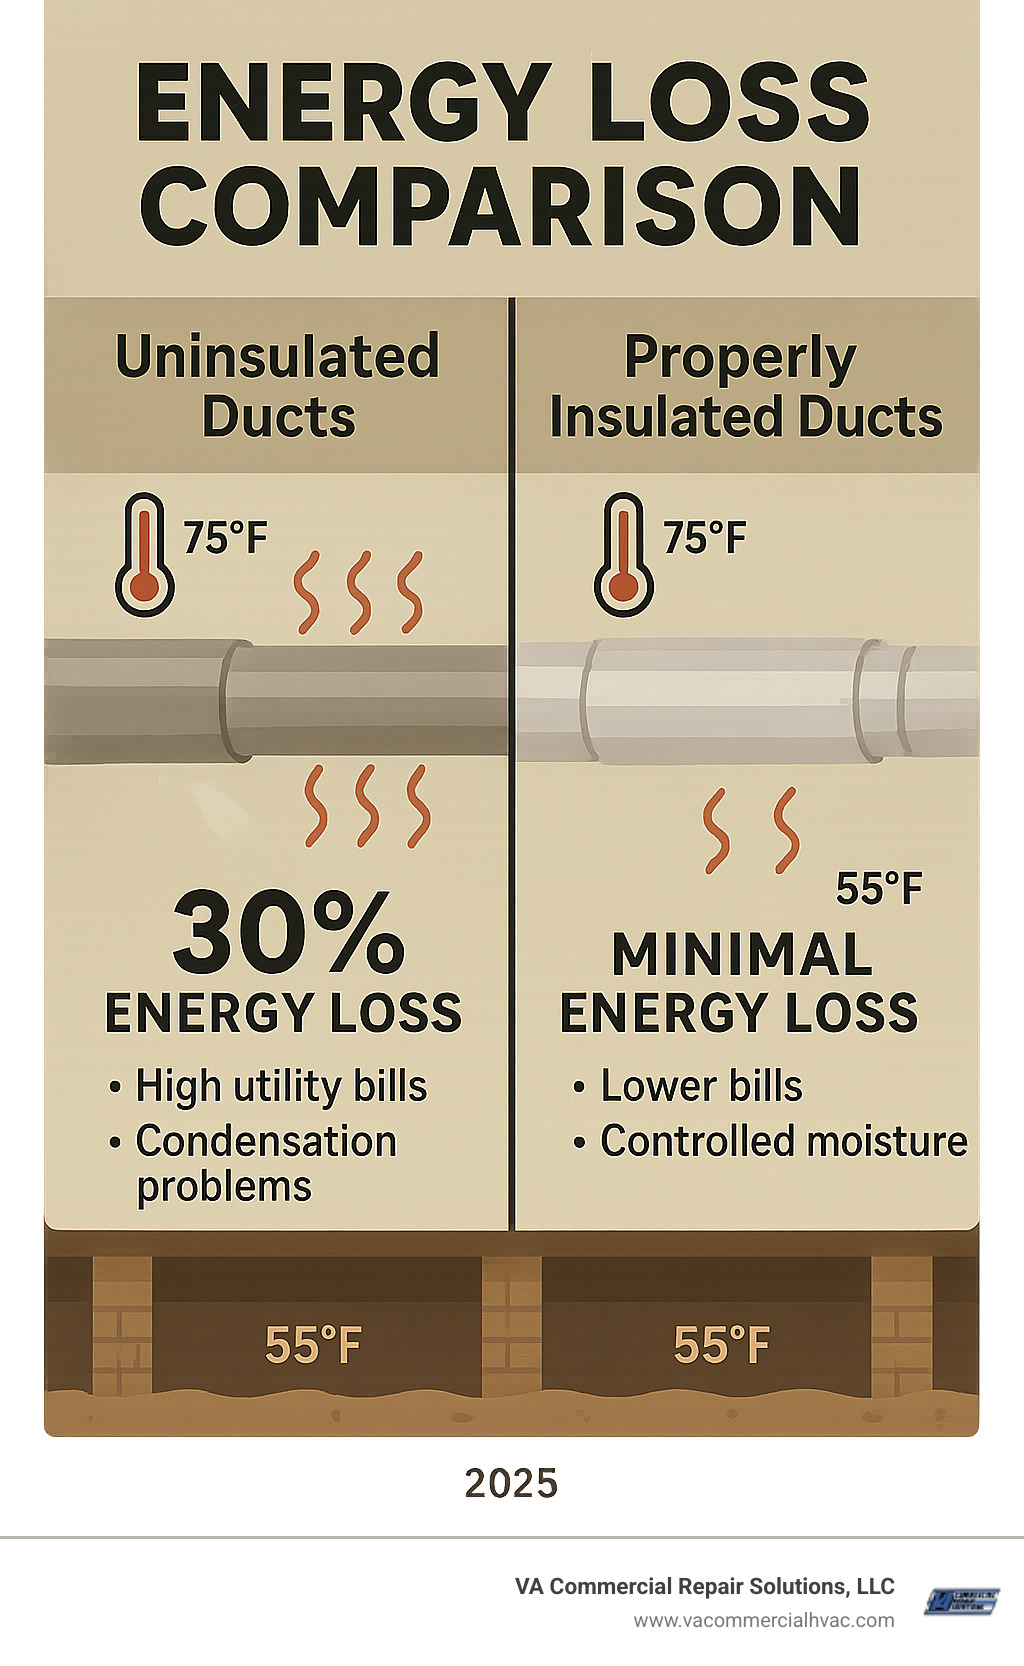
Infographic showing energy loss comparison between uninsulated ducts (30% energy loss, high utility bills, condensation problems) versus properly insulated ducts (minimal energy loss, lower bills, controlled moisture) in a crawl space setting with temperature readings and cost savings data - insulating ductwork in crawl space infographic

Why Your Crawl Space Ducts Are a Hidden Energy Drain

Picture this: you're paying to heat or cool your business, but a good chunk of that perfectly conditioned air is escaping into your crawl space before it ever reaches your customers and employees. It's like having a hole in your wallet that just keeps getting bigger every month.

When ductwork runs through an unconditioned crawl space, you're essentially fighting a losing battle against the elements. That energy waste is real – and it's costing you more than you might think. The Department of Energy reports that leaky ducts can account for significant energy loss, sometimes up to 30% of your heating and cooling capacity. That's money disappearing into thin air, literally.

Your high utility bills are just the beginning. When your HVAC system has to work overtime to compensate for all that lost air, it's putting serious HVAC strain on your equipment. Think of it like running a marathon while carrying a heavy backpack – eventually, something's going to give out. You can find more info about evaluating your system to see if yours is working harder than it should.

But here's where things get really problematic. Uninsulated ducts create the perfect storm for condensation issues. When cold air from your AC travels through warm, humid ducts in summer, or when warm air meets cold crawl space conditions in winter, moisture builds up on the duct surfaces. This "duct sweating" creates a damp environment that's practically an invitation for mold growth .

Once mold takes hold, you're dealing with poor indoor air quality that can affect everyone in your building. Those musty smells and stuffy conditions aren't just unpleasant – they can impact your employees' health and your customers' experience.

The Critical First Step: Sealing Air Leaks

Before we even talk about insulating ductwork in crawl space , we need to address the elephant in the room: duct leaks . Adding insulation to leaky ducts is like putting a sweater on someone who's bleeding – you're missing the real problem.

Conditioned air loss through unsealed ducts is a massive energy drain. Even well-installed systems can have around 3% leakage, but older installations from the 1990s or earlier? We're talking 15-20% of your air just vanishing into the crawl space.

The solution is proper sealing with mastic sealant and foil tape . Mastic is like a thick, paintable putty that dries to form an incredibly durable seal. It won't crack, shrink, or fall off over time – unlike some other "solutions" we've seen fail spectacularly.

For smaller gaps and sealing joints , UL 181-rated foil tape is your friend. Pay special attention to sealing connections where duct sections meet, where ducts connect to your HVAC unit, and especially at registers and grilles. These spots are notorious for developing leaks.

Here's a pro tip that might save you from a costly mistake: why you should never use standard duct tape. Despite its name, regular duct tape is terrible for actual ductwork. It degrades quickly, loses its stick, and basically turns into expensive confetti in your crawl space. We've seen too many "quick fixes" that turned into ongoing problems.

Key Benefits of Insulating Your Ductwork

Once your ducts are properly sealed, the benefits of insulation become crystal clear. You'll see energy savings almost immediately as your HVAC system doesn't have to work as hard to maintain comfortable temperatures. We're talking real money here – hundreds of dollars annually that stays in your pocket instead of disappearing into your crawl space.

Improved comfort is another game-changer. No more cold spots in winter or stuffy areas in summer. Your employees will be happier, your customers more comfortable, and your thermostat will actually mean something again.

Moisture control is huge for protecting your building's structure and maintaining a healthy environment. Insulation prevents condensation on duct surfaces, eliminating the conditions that mold and mildew love. This means cleaner air and fewer headaches down the road.

Your HVAC equipment will thank you too. When your system isn't constantly overworking, it experiences less wear and tear, leading to a longer HVAC lifespan . That expensive equipment you invested in? It'll last longer and perform better.

Finally, better air quality and reduced noise from your HVAC system create a more pleasant environment for everyone. Your ducts won't be rattling and banging as much, and you won't be circulating pollutants from the crawl space throughout your building.

Top Insulation Materials for Crawl Space Ductwork

When it comes to insulating ductwork in crawl space , choosing the right material can make the difference between a job that pays for itself quickly and one that leaves you wondering where your money went. Each option offers its own balance of upfront cost, how easy it is to work with, and how well it actually insulates your ducts.

The effectiveness of any insulation is measured by its R-value – think of it as the material's resistance to heat flow. The higher the R-value, the better it insulates. For ducts running through unconditioned spaces like crawl spaces, most building codes call for R-8 insulation as the minimum. Of course, we always recommend checking with your local building authorities in Charlottesville, Harrisonburg, or wherever you're located in Virginia, since requirements can vary by locality.

Here's how the three most common materials stack up:

Material Cost DIY-Friendliness Typical R-Value Notes
Fiberglass Duct Wrap Most affordable Easy for most people R-6 to R-8 Widely available, requires safety gear
Rigid Foam Board Moderate Moderate skill needed R-5 to R-6 per inch Excellent moisture resistance
Spray Foam Most expensive Professional installation R-6 to R-7 per inch Best air sealing properties

Fiberglass Duct Wrap

This is the workhorse of duct insulation – the material you'll find in most supply stores and the one most facility managers choose for their first insulating ductwork in crawl space project. Fiberglass duct wrap is popular for good reason: it's cost-effective , relatively easy to work with, and gets the job done well.

Most fiberglass duct wrap comes with a foil-faced vapor barrier on one side, which is crucial for preventing moisture problems. You'll typically find it in convenient rolls, making it easy to transport and work with in tight crawl spaces. The material is flexible enough to wrap around rectangular and round ducts without too much fuss.

However, there's an important safety consideration. Proper handling and PPE are absolutely required when working with fiberglass. Those tiny glass fibers can irritate your skin, eyes, and respiratory system. Always wear long sleeves, gloves, safety glasses, and a dust mask. Trust me, skipping the safety gear will make for a very uncomfortable day.

Rigid Foam Board

If you're looking for higher R-value per inch and superior moisture resistance , rigid foam board might be your answer. This material is particularly effective in humid crawl spaces where moisture control is a primary concern. It's also incredibly durable – once properly installed, it can last for decades without degrading.

The main challenge with rigid foam board is the installation process. Cutting and fitting the boards around ducts requires more skill and patience than simply wrapping with fiberglass. You'll need to carefully measure each section, cut the foam to fit, and then seal all seams with specialized tape to maintain the vapor barrier.

While it requires more upfront effort, many facility managers find that the long-term performance and moisture resistance make it worth the extra work, especially in particularly humid or problematic crawl spaces.

Spray Foam Insulation

For the ultimate in performance, spray foam insulation offers excellent air sealing properties and the ability to fill irregular gaps that other materials might miss. It expands to fill every nook and cranny, creating a seamless insulation barrier that's hard to beat.

However, we typically recommend professional application for spray foam, especially in commercial settings. The equipment is expensive, the chemicals require careful handling, and getting the right thickness and coverage takes experience. While the higher cost can be a deterrent, the superior performance often justifies the investment for businesses with significant energy costs.

You'll also need to choose between closed-cell and open-cell spray foam. Closed-cell offers better insulation value and moisture resistance, while open-cell is more affordable but less effective in humid conditions. For most crawl space applications, closed-cell is the better choice.

Top Insulation Materials for Crawl Space Ductwork

When it comes to insulating ductwork in crawl space , choosing the right material is crucial. Each option offers a different balance of cost, ease of installation, and thermal performance. Insulation effectiveness is measured by its R-value , which indicates its resistance to heat flow. A higher R-value means better insulating power. For ducts in unconditioned spaces like crawl spaces, the Residential Building Code often calls for an R-8 insulation rating, though we always recommend checking with your local building codes in Charlottesville, Harrisonburg, or other Virginia localities for specific requirements.

Here's a comparison of the most common materials we encounter:

Material Cost (General) DIY-Friendliness (General) Typical R-Value (per inch or total) Notes
Fiberglass Duct Wrap Low to Moderate High R-6 to R-8 total Most common choice; includes foil vapor barrier; widely available
Rigid Foam Board Moderate to High Moderate R-3 to R-6 per inch Higher R-value per inch; moisture resistant; requires cutting and fitting
Spray Foam Insulation High Low (Professional recommended) R-3 to R-7 per inch Excellent air sealing; fills gaps; professional application preferred

Fiberglass Duct Wrap

Fiberglass duct wrap remains the most popular choice for insulating ductwork in crawl space projects, and for good reason. It's cost-effective, readily available at most home improvement stores, and comes with a foil-faced vapor barrier that helps prevent condensation and moisture problems.

This insulation typically comes in convenient rolls, making it relatively easy to handle and install around both round and rectangular ducts. The foil backing serves double duty - it acts as a vapor barrier to prevent moisture buildup and provides a clean surface for sealing seams with foil tape.

When working with fiberglass insulation, proper handling is essential. Always wear personal protective equipment (PPE) including long sleeves, safety glasses, a dust mask, and work gloves. The tiny glass fibers can irritate skin and respiratory systems, so taking these precautions isn't optional - it's necessary for your safety and comfort.

Rigid Foam Board

For those seeking higher R-value per inch , rigid foam board insulation offers excellent thermal performance. This material is particularly moisture resistant and incredibly durable, making it ideal for the sometimes harsh conditions found in crawl spaces.

The main challenge with rigid foam board is the installation process. You'll need to carefully measure and cut pieces to fit around your ductwork, which can be time-consuming, especially around complex duct configurations. Cutting and fitting requires patience and precision, but the results are worth it.

Once installed, all seams must be sealed with specialized tape designed for foam board applications. This creates a continuous thermal barrier that can significantly outperform other insulation types in terms of long-term energy savings.

Spray Foam Insulation

Spray foam insulation represents the premium option for duct insulation, offering excellent air sealing properties that other materials simply can't match. It expands to fill irregular gaps and spaces, creating a seamless barrier around your ductwork.

The biggest advantage of spray foam is its ability to address air leaks and insulation in one application. It adheres directly to duct surfaces and surrounding structures, eliminating the gaps that can reduce the effectiveness of other insulation types.

However, spray foam typically requires professional application due to the specialized equipment needed and the importance of proper mixing and application techniques. The higher cost reflects both the material expense and the skilled labor required for installation.

When considering spray foam, you'll encounter two main types: closed-cell and open-cell foam. Closed-cell foam offers higher R-values and better moisture resistance, making it the preferred choice for crawl space applications where humidity can be a concern.

The choice between these materials often comes down to your budget, DIY comfort level, and specific crawl space conditions. In my experience helping Central Virginia businesses, fiberglass duct wrap handles most situations effectively, while spray foam makes sense for complex installations or when you're dealing with significant air leakage issues.

July 28, 2026
 Commercial refrigeration failure is one of the costliest equipment problems a food-service business can face. A walk-in cooler that stops working overnight can mean thousands of dollars in spoiled inventory by morning. A broken ice machine brings service to a halt faster than almost any other single failure. The problem is that most HVAC contractors don't actually service commercial refrigeration. Walk-in coolers, ice machines, and commercial chillers require different certifications, training, and tools than standard commercial AC. Call an HVAC company for a refrigeration problem and you often get someone learning your equipment on your dime. This guide identifies the four best commercial refrigeration and ice maker repair companies in Virginia. We evaluated each on refrigeration-specific experience, equipment coverage, certifications, geographic reach, and how they serve commercial operators in practice. Virginia's Top 4 Commercial Refrigeration Companies at a Glance VA Commercial Repair Solutions is the dedicated specialist for the Shenandoah Valley and central Virginia. They cover refrigeration, ice makers, walk-in coolers, and kitchen equipment under one Class A license. Elite Service & Enterprises serves Hampton Roads with a commercial-only cross-trade model that covers refrigeration, HVAC, and electrical in-house. Oasis Heating, A/C & Refrigeration covers Northern Virginia's light commercial refrigeration needs alongside their core HVAC practice. Reliance Repairs focuses on commercial ice machine and refrigeration repair across Northern Virginia and the Washington DC area.
July 28, 2026
An HVAC system rarely fails without warning. Most breakdowns follow a pattern of declining performance — reduced airflow, inconsistent temperatures, unusual sounds — that diagnosis catches early. Knowing how to read those signals lets you triage problems faster and hand off the right information to a technician. This guide walks through the steps of commercial HVAC diagnosis. Some checks you can perform yourself. Others require a licensed technician with specialized tools and EPA certification. We'll be clear about which is which throughout. Commercial HVAC diagnosis matters because misdiagnosis is expensive. A technician who swaps parts without isolating the root cause delivers a short-term fix. It often leads to repeat failure within weeks. According to the U.S. Department of Energy , a well-maintained commercial HVAC system can be 15–40% more efficient than a neglected one. Systematic diagnosis is how you protect that efficiency — and your budget. What Effective HVAC Diagnosis Actually Means Good diagnosis is not guessing. It's eliminating causes methodically until you identify the actual failure point. The best technicians work through a logical sequence. Check the control system before the hardware. Check simple hardware before complex hardware. Rule out maintenance issues before ordering parts. That same sequence is what this guide follows. Work through the steps in order. Don't skip ahead to the refrigerant circuit if you haven't checked the thermostat. Many expensive service calls trace back to a dead battery or a tripped breaker. Step 1: Start with the Control System Most HVAC "failures" aren't mechanical at all. They're control system issues — a wrong thermostat setting, the wrong operating mode, dead batteries, or a tripped circuit breaker. These cause a significant share of unnecessary service calls across the industry. Start at the thermostat. Verify it's set to the right mode (cooling, not heating). Confirm the setpoint is lower than the current room temperature. Confirm the fan is set to Auto, not On. If it's a battery-powered thermostat, swap the batteries before anything else. Then go to the electrical panel. Look for a tripped breaker on the circuit feeding the HVAC system. Reset it once. If it trips again, stop. A recurring trip signals an overload, short circuit, or ground fault — not a simple reset situation. Also check the disconnect switch near the outdoor condenser unit; these are frequently left in the "off" position after maintenance. Step 2: Inspect the Air Filters A dirty air filter is the most common preventable cause of commercial HVAC inefficiency. ENERGY STAR estimates that clogged filters make HVAC systems work harder, driving up energy costs and accelerating component wear. In commercial kitchens, restaurants, and manufacturing environments, filters clog far faster than the manufacturer's default schedule assumes. Check your filters monthly. Remove the filter and hold it up to a light source. If you can't see light through it, it needs replacing. Also check whether the filter has collapsed or pulled away from its frame. A compromised filter allows debris to bypass it and land directly on the evaporator coil. For commercial systems running multiple zones, check every filter, not just the accessible ones. A single clogged filter in a multi-zone system can restrict enough airflow to trigger alarms across the whole building. Step 3: Check the Outdoor Condenser Unit The outdoor condenser is where your system expels heat from the building. If it can't reject heat effectively, the whole system suffers — regardless of how well everything else functions. Clearance: The condenser unit needs at least 24 inches of unobstructed space on all sides. Vegetation, stored equipment, or debris against the unit restricts airflow and forces head pressure up. High head pressure strains the compressor and reduces cooling capacity. Coil condition: Look at the coil face for bent fins, debris embedded between the fins, or a visible dirt coating on the surface. A heavily fouled condenser coil can meaningfully reduce system efficiency. Coil cleaning requires professional tools and should never be attempted with a pressure washer — the fins are fragile aluminum and bend easily. Fan operation: With the system running, confirm the condenser fan is spinning. A failed fan motor causes the system to overheat and trip the compressor's thermal overload protection. The unit will appear to run but produce no cooling. Disconnect box: Inspect the condenser disconnect box for burn marks or discoloration around the terminals. Do not open or touch the internal components unless you are a licensed electrician. Step 4: Listen and Smell for Warning Signs Your HVAC system communicates through sound and odor. Unusual outputs from a running system are diagnostic data, not background noise. Grinding or squealing: Points to a failing bearing — typically in the blower motor or the condenser fan motor. Bearings wear predictably over time. Acting on a bearing symptom early is far cheaper than replacing a seized motor after it fails. Banging or rattling: Suggests loose components in the blower assembly, a bent fan blade, or a refrigerant line vibrating against sheet metal. If the banging is loud, turn the system off. Loose parts can cause secondary damage to adjacent components. Burning smell: A burning electrical odor means a wire, motor winding, or capacitor is overheating. Shut the system off immediately and call a technician. Running a system with an active electrical fault can cause a fire. Musty or mildew odor from vents: This typically indicates mold or biofilm growth in the drain pan or on the evaporator coil surface. According to the EPA , mold in HVAC systems can degrade indoor air quality and trigger health complaints in building occupants. Musty odors from vents should not be ignored. Step 5: Check for Refrigerant and Evaporator Issues The refrigerant circuit is the core of any cooling system. Problems here produce specific, recognizable symptoms that distinguish them from other failure types. Warm air from vents: If the system is running but blowing warm or room-temperature air, suspect a refrigerant issue, a failed compressor, or a severely fouled evaporator coil. Ice forming on refrigerant lines or the evaporator: Ice on the suction line (the larger insulated line running between indoor and outdoor units) usually means low refrigerant charge or severely restricted airflow. Turn the system off and let it thaw fully before restarting. Do not chip or pry ice from coils — you will damage the fins. Hissing or bubbling near refrigerant lines: Can indicate a leak point where refrigerant is escaping. EPA Section 608 regulations require that refrigerant handling — leak repair, evacuation, and recharge — be performed by a technician holding EPA Section 608 certification. This is not a DIY repair under any circumstances. If you suspect a refrigerant issue, shut the system off and call a licensed commercial HVAC technician. They'll locate the leak with an electronic detector, repair it at the source, and evacuate the system. Then they recharge it with the correct refrigerant type and quantity. Step 6: Inspect the Indoor Air Handler The air handler circulates conditioned air through your ductwork. Problems here affect airflow volume and temperature consistency across every zone the system serves. Drain pan: Check for standing water. A clogged condensate drain line is one of the most frequent service issues for commercial systems in Virginia's humid climate. Standing water in the drain pan grows mold quickly and eventually triggers a float switch that shuts the system off — or overflows onto equipment and finished ceilings. Blower wheel: If you can safely access the blower compartment, inspect the blower wheel for debris accumulation. A clogged blower wheel loses significant airflow efficiency and puts mechanical strain on the motor. Heavy buildup is a sign of a filter that was missed or bypassed. Evaporator coil: Look for visible dirt accumulation or ice. Coil cleaning requires specific tools and chemicals — it's a technician task. Attempting to clean an evaporator coil yourself with household cleaners can damage the fins and void equipment warranties. Step 7: Evaluate Ductwork and Airflow Distribution Duct problems can mimic equipment failures convincingly. A disconnected section or stuck damper can make the system look like it's failing when the central equipment is fine. Walk the facility and compare temperatures zone by zone. If some rooms are significantly warmer or cooler than others while the system runs, suspect ductwork before assuming equipment failure. Check visible ductwork for disconnected joints, tears or holes in flexible duct, and crushed or kinked sections. Also verify damper positions. Manually operated dampers are sometimes left closed after maintenance visits or seasonal adjustments. ENERGY STAR research indicates that duct leaks in commercial buildings can waste large portions of conditioned air. Often, that lost air never reaches the occupied space. Resealing duct connections is a cost-effective repair with a measurable impact on energy costs and comfort. Step 8: Know When to Stop and Call a Professional Some HVAC checks are safe to perform without trade experience or special tools. These include replacing filters, clearing condenser zones, resetting breakers, checking thermostat settings, and noting sounds. Most diagnostic steps beyond that require a licensed technician. Call a commercial HVAC contractor immediately when any of the following apply: A reset circuit breaker trips again without running the system You hear grinding, loud banging, or burning sounds from any component You smell burning from anywhere in the system The system runs but produces no cooling or heating You suspect a refrigerant issue (warm air, icing on lines, hissing) Standing water is visible in the drain pan or dripping from the unit The compressor cycles on and off in rapid succession (short cycling) Any electrical component shows burn marks, discoloration, or visible damage Attempting DIY repairs on refrigerant circuits, electrical panels, or compressors voids equipment warranties. Refrigerant handling without EPA Section 608 certification violates federal regulations and carries civil penalties. When an HVAC System Can't Be Repaired Not every HVAC failure is repairable. Some conditions require equipment replacement regardless of the technician's skill or the repair budget available. VA Commercial Repair Solutions — with 17+ years in central Virginia — identifies four failure types that can't be repaired: A failed compressor that tests open (ohms to infinity) or shorted to ground. The compressor is the heart of the refrigerant circuit. There is no field repair. A refrigerant leak in an aluminum evaporator coil. Copper coils can be brazed and repaired; aluminum coils cannot. A leaking aluminum coil means coil replacement. A failed heat exchanger made of cast iron. Steel heat exchangers can be welded and repaired; cast iron cannot. A cracked boiler combustion chamber. This is a code violation as well as a mechanical failure — replacement is mandatory. A good contractor shows you the evidence — meter readings, inspection results — not just asserts that replacement is needed. If a contractor recommends replacement without showing you why, ask to see the data. What to Tell Your Technician Before They Arrive The more precise information you provide, the faster the diagnosis. Before calling a commercial HVAC contractor, document these data points: Operating symptoms: What is the system doing, and what is it failing to do? Is it running but not cooling? Running briefly and shutting off? Not starting at all? When it started: Did the problem appear suddenly, or has performance been declining over days or weeks? Sudden failures often indicate electrical or mechanical events. Gradual decline points to maintenance issues — dirty coils, low refrigerant charge, failing capacitors. Any recent changes: Was the system serviced recently? Were filters changed? Was any construction or renovation work done near the equipment? Error codes or indicator lights: Modern commercial HVAC controls display fault codes when the system trips. Write down any codes showing on the thermostat or control board before the technician arrives. Fault codes narrow the diagnosis significantly. System age and service history: How old is the equipment? When was it last serviced? Has it needed repair before, and for what? Common Questions About HVAC System Diagnosis How do I know if my problem is electrical or mechanical? Electrical failures often appear as complete non-starts, tripped breakers, burn marks near components, or a burning smell. Mechanical failures produce sounds — grinding, squealing, banging — or visible damage like a bent fan blade. That said, the two often compound each other. A seized mechanical component puts electrical load on the motor winding, causing both failure types simultaneously. How long does a commercial HVAC diagnosis take? A qualified commercial technician can typically complete an initial diagnosis in one to two hours for standard equipment. Complex failures — refrigerant issues, building automation faults, multi-zone duct problems — may need a return visit with specialty equipment. Can I diagnose my commercial HVAC system myself? The steps in this guide cover what's safe to check without a license or specialized tools. Filter inspection, thermostat checks, condenser clearance, and sound/odor identification are all within reach. Anything involving refrigerant circuits, electrical panel access, or compressor testing requires a licensed technician. What is the most common cause of commercial AC failure in Virginia's climate? In Virginia's humid summers, four causes dominate. Dirty air filters create coil icing and compressor strain. Dirty condenser coils cut heat rejection capacity. Refrigerant leaks from worn fittings or coil corrosion are also common. So are failed capacitors or contactors — electrical parts that wear faster in Virginia heat. Regular preventive maintenance catches all four before they become failures. When does repair make more sense than replacement? If repair costs under 50% of replacement on a system less than 10 years old, repair wins. A system over 10 years old, with repeated repairs, or on a phased-out refrigerant usually calls for replacement. A trustworthy contractor will give you both numbers and let you decide. What does short cycling mean, and why is it a problem? Short cycling means the compressor starts and stops rapidly — typically less than two minutes per cycle. It indicates refrigerant issues, electrical faults, an oversized system, or a failing compressor. Short cycling causes extreme wear on the compressor and dramatically shortens equipment life. It should be diagnosed promptly. Conclusion: Diagnosis First, Repair Second Effective HVAC repair starts with effective diagnosis. A technician who replaces components without isolating the root cause delivers a short-term fix that often leads to repeat failure. Working through each system layer — control, filters, outdoor unit, sounds, refrigerant, air handler, ductwork — finds the real problem. For commercial facilities in Virginia, the stakes are high. Downtime costs money, failed health inspections cost permits, and equipment damage from a misdiagnosed repair compounds the original problem. Systematic diagnosis reduces all three risks. VA Commercial Repair Solutions completes 85% of calls in a single visit — the best first-visit rate in central Virginia. Schedule a service call today — Class A licensed, live phone 24/7. Can't fix it? They pay you for the trip.
July 28, 2026
A commercial AC failure during a Virginia summer isn't an inconvenience. It's a revenue crisis. Restaurant kitchens hit dangerous temperatures. Hotels lose bookings. Server rooms face equipment damage within hours. Most HVAC contractors you'll find online serve homeowners. Commercial systems run under heavier continuous loads and require a different licensing tier. Choosing a residential contractor for a commercial problem wastes time and often makes things worse. This guide covers the five best commercial AC and HVAC repair companies in Virginia. We evaluated each on service depth, contractor credentials, geographic coverage, and what they actually deliver for commercial operators. Virginia's Top 5 Commercial HVAC Companies at a Glance VA Commercial Repair Solutions covers the Shenandoah Valley and central Virginia with 24/7 live-person answering and a repair-before-replacement guarantee. Southern Air is Virginia's largest MEP contractor — 100% employee-owned since 1946 with 10 locations across three states.  James River Air has led Richmond commercial HVAC since 1967 with 150 technicians and 80+ service trucks. Elite Service & Enterprises is Hampton Roads' commercial-only specialist, covering HVAC, refrigeration, and electrical under a single Class A license. Oasis Heating, A/C & Refrigeration rounds out the list as Northern Virginia's combined HVAC and commercial refrigeration option since 1998.
rooftop ladder lawsuit
By Chuck Weisman July 7, 2026
A missing or unsafe rooftop ladder can cost far more than the ladder itself. See the real risks, real numbers, and a real court case.
Rooftop safety access ladders
By VA Commercial HVAC July 7, 2026
Rooftop access ladders keep workers safe and buildings up to code. Learn why they matter and how VA Commercial Repair Solutions installs them right.
Commercial AC Maintenance Services in Staunton VA
By Chuck Weisman May 24, 2026
Learn what comprehensive commercial AC maintenance in Staunton, VA typically includes, from inspections and cleaning to system testing and tune-ups.
Person analyzing data on multiple glowing monitors in a dark office
By Chuck Weisman May 20, 2026
Facing an HVAC emergency in Virginia? Discover the best platforms for emergency commercial HVAC repair in VA, plus what to ask before you hire anyone.
Technician providing Preventive Maintenance Services for Commercial HVAC Systems in Virginia
By Chuck Weisman May 20, 2026
Preventive maintenance services for Commercial HVAC systems in VA help businesses reduce downtime, improve energy efficiency, and extend equipment lifespan.
Two workers in hard hats stand on a rooftop with HVAC units and a city skyline behind them.
By Chuck Weisman May 20, 2026
Discover the best commercial HVAC services with our 2026 guide. Explore top HVAC companies in the USA, & get expert insights on HVAC installation & maintenance.
Signs Your Commercial AC Needs Maintenance Staunton VA
By Chuck Weisman May 13, 2026
Learn the warning signs your commercial AC system needs maintenance in Staunton, VA, including poor airflow, uneven cooling & higher energy costs.